Pages

Showing posts with label Body. Show all posts

Sunday, 29 March 2015

Inside the boot

This part of the build seemed to take forever for something that doesn't appear that complex. In summary it involved:
 - Trimming and fitting the rear inner arches
 - Board off the fuel tank
 - Fitting the carpet

However, it wasn't that simple. Fitting the inner arches involves many trial fittings and trimming of the fibre glass and then securing them in so they seal in the boot and behind the seat. Learning to fibre glass was a new skill and is actually quite simple once you have the right kit ( thanks ebay!) I decided  that unlike the front wheel arch inners these didn't need to be removable:

I decided to board in the fuel tank away from the boot itself. I wasn't sure if it was an IVA requirement, but the less Mr. IVA can see the better and I felt it was neater to have one flat edge to fit the carpet to. It proved a good decision as during the IVA he opened the boot and took one look and closed the lid saying there wasn't much to see in there :-)

The board is made of 2 pieces of marine ply attached to the bottom and sides of the boot allowing the number plate light wire to appear and up to the boot.

I've lost count of the number of times I have had to remove those panels:
 - After fitting, the fuel pump failed and had to be replaced.
 - After replacing the fuel pump a fuel smell developed in the boot (not good!)
 - After re-fitting and tighening all unions the smell was still there
 - Finally narrowed it down the plastic fuel filter - frustrating as it was only slightly porous, so needed to be felt over night before any smell became evident.

Grills

The grills on the front (4 in total) can be purchased from Pilgrim, but I found it cheaper to purchase the mesh and cut my own from B&Q. Also you can choose the size of mess to allow more air flow into the radiator. I fixed the bottom grill with tiger sealant as it won't ever need to come out again. The middle and 2 side grills were fit with small flathead M4 nuts and bolts so they can be removed. While building I frequently needed access through all 3 of the whole, so good to make the removable.


Saturday, 24 May 2014

Doors

From all the posts and chat on the forums it appears that getting the doors lined up and fitting is a complete nightmare. After painting the hinges and cutting holes in body, I trial fitted them and it appeared there was a lot of movement, up/down, left/right. So I set them in the middle to allow movement either way. As per the instructions I offset them from the chassis with an m10 nut.

I held the doors up against the hinges and used bits of folded cardboard to pad the door away from the body. After marking some holes in the door it was obvious that I was going to need a different number of washers between the hinge and the door. I tighten it all up and was pleasantly surprised that the door didn't look too bad. It open and closed :-) It did rub slightly on the edge near the hinge, but a little filing sorted that. By adding/removing washers to one of the 4 holes bolting the door to the hinge I was able to get pretty good alignment. Add to that moving the body in a little and bolting to the chassis the doors fit fairly well. The secret is to secure the hinge to the chassis and not be tempted to adjust that, and only adjust the hinge to door bolts - well it worked for me. I probably only spent 1/2 a day aligning each door.

Next came to the door latches. I didn't keep the original Sierra door latches so I bought some from Car Builder solutions and some flush door handles.


I had to make up some brackets as the ones supplied by Pilgrim were intended for the bigger Sierra handles (which I think look rubbish. These chrome handles look much better. Once the bracket was installed I made up some door cards from 3mm marine ply. I connected the door handles to the latched using a piece of bend wire from an old wire coat hanger!

Since the door cards go on last and clip on the handles needed to be secured to the door before the card goes on and then lastly the plastic surround.


Next is to cover the cards in vinyl (or leather) and decide whether I need/want a pocket in the door.


Thursday, 22 May 2014

Rear Lights

The rear needs to include:
 - Tail lights
 - Brake lights
 - Indicators
 - Reversing light
 - Fog light
 - and last but not least reflectors

After much thought I went for a combined red tail and brake light and an indicator on each side which fit nicely in the space on the body. Reflectors didn't seem to fit anywhere sensible, so I made up a simple bracket to fit to the nudge bar supports:


And it sits nicely in the gap in the nudge bar:

The single fog and reversing light (which are both IVA requirements) again didn't fit anywhere on the body. So after much searching I found a matching pair of slim box lights, one white, and one red. Using two large P clips with rubber covering I bolted these to the nudge bar:

Monday, 19 May 2014

Nudge bars

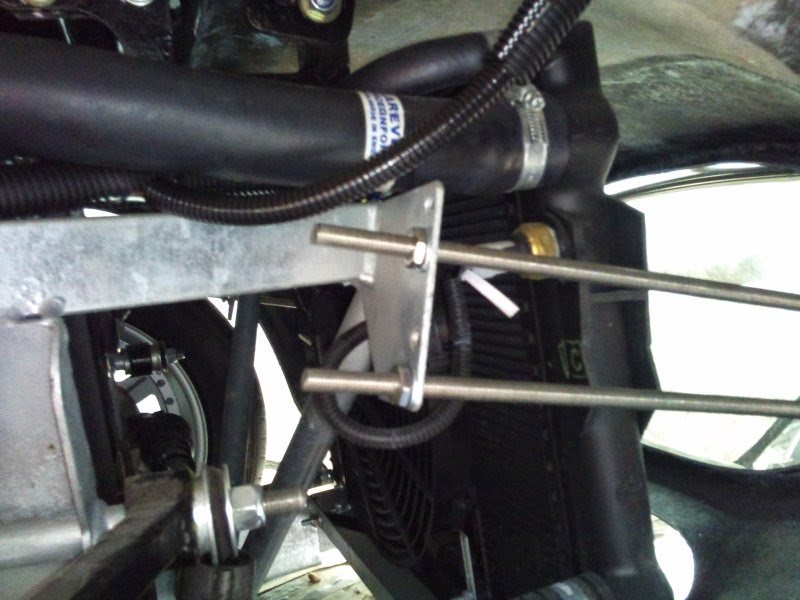
Fitting the nudge bars back and front was fun and instantly rewarding as they look great. The front wasn't as easy as I thought, as even with the holes in body drilled out the supports didn't fit. Advice from Pilgrim was to add a small bend to the studding that supports the nudge bar.
The studding feeds through the body and attaches to 2 out of the 4 holes in the chassis:


 The rear nudge bars are fairly simple with L shaped brackets to attach to the boot floor:


Exhausts

Back last summer I managed to get some 2nd hand exhausts which were in good condition and perfect for my headers. The questions was what to do with the steel headers to stop them rusting. I looked into ceramic coating, but it's rather expensive, and doesn't help reduce the under-bonnet heat, so I opted for exhaust wrap. The problem with wrap is that it can absorb moisture when the car is left and that will rust the pipes. So, a coating of very high exhaust paint (actually I used fireplace paint!) solved the rusting problem and the exhaust wrap will reduce the heat. All good after a very wet winter with only a few engine starts... The wet winter has caused a clutch problem though - more on this later :-(

Once the headers were wrapped and fit, cutting holes in the body was simple and looked great once the plated were attached:
Once the exhaust L section was clamped on to the headers, adding the side pipes was easy with a couple of bolt holes into the chassis and some new rubber bobbins. I have also some exhaust filler to keep the noise down for IVA, but I'll stuff that into the exhaust just before the test so it has maximum effect.


I couldn't wait to fire up the v8 beast now that the exhaust was attached. Sadly it coughed and spluttered and there was finally a bang and burst of flame from the air filter. I quickly turned it off and waited for my pulse to return to normal. After some thinking and forum advice, I checked the timing, since there was fuel, and clearly spark. It was way out! I set it to 10deg BTDC and boom! It fired up and made a great noise. After a little while it even ticked over fairly well. I then got a boast of confidence and felt like I could rule the world. So I slid it into gear and reversed slowly a few feet.....YES! It moved. Sadly after a few feet the clutch pedal went to the floor and the car jerked backwards and thankfully stalled. The clutch stopped working. if you read on, this became the bane of my life for the next 8 months :-(


Sunday, 18 May 2014

The boot lid fixings

The boot lid fixings included the hinges, the lock, the support stay and the number plate light.
The hinges were fairly straightforward once they were lined up

The boot lock and handle.


And lastly the number plate light. Easy to fit with 2 bolts, but the tough part is the wiring. I didn't want to attach a wire along the inside of the boot and knew it was possible to feed a wire between the inner and outer skins of the boot. With a hole drilled near the light and another near the hinge, I followed the advice on the forums to get the wire through. The idea is to have a piece of thread tied to a metal nut and feed to nut through the channel using a magnet. Sounds easy, but mine kept getting caught on rough inside of the fibreglass. I solved it by using a piece of net curtain wire, strong enough to push through the hole and flexible enough to feed around the corners. Once through the channel and out the other side it was a simple matter to tie the piece of wire to it and pull it through. Adding a a grommet in each hole and job done!


Roll bar

The roll bar was easy to fit using the manual as a guide, and ensuring the correct height was achieved. Cutting the holes in the body needed to be fairly accurate. To mark the holes from the underside I used an empty sealant tube as a guide from the chassis up towards the body. Once the hole was cut and enlarged slightly the roll bar slid neatly into place. I did notice that the legs were quite parallel, and as it slid down I needed to widen the holes on one side - it didn't matter as the escutcheon plate hid all that. It was a tight fit and I greased the chassis and used a rubber mallet to tap it home. The bar is stainless steel and therefore VERY hard to drill. Once mounted I slowly drilled a hole through the bar and chassis using new titanium tipped drill bits.

Saturday, 17 May 2014

Seat Belt Strenghening

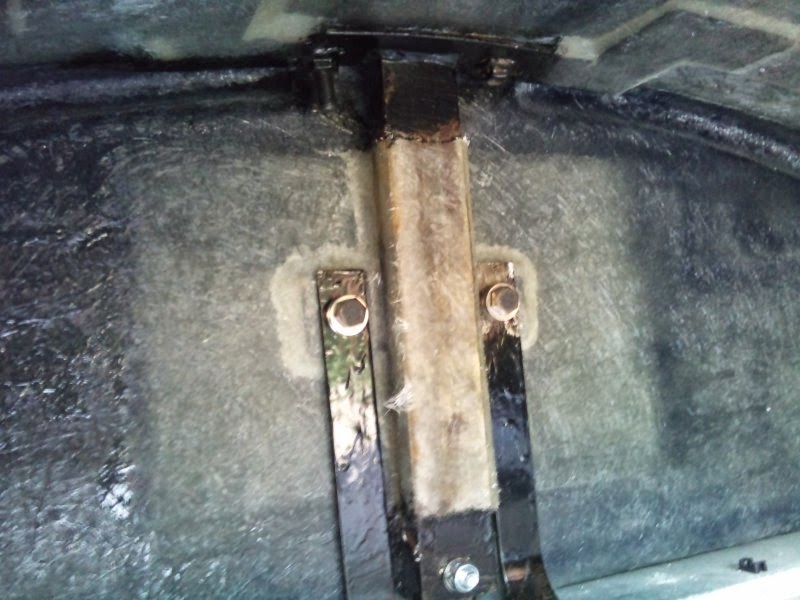
On the MkIII Sumo Pilgrim the seat belt reels and upper support are attached to the fibreglass body. To strengthen and support the seat belts, metal panels are bonded into the body. The seat belts have passed a strength test which has been filed with VOSA and I will be referring to that in my IVA. However, some have failed on not having sufficient support for the seat belt mounting. So, to be on the safe side I have added supports and attached the existing metal to the chassis:

From inside the boot, the supports can be seen with the bonded metal plates. I've added the additional vertical supports either side of the main support bar and bolted them to the chassis. I've taken photos at every stage to show Mr. IVA  that the seat belts are bonded to the metal (and not the fibreglass body), and these in turn are attached to the chasssis. Safe? I think so! From above:
And finally both seat belts attached and secure:


Bonnet fittings

It's been a while since I posted (over a year - whoops!)... So back in Feb 2013 I started to work on adding all the fun stuff to the bonnet: Handles, Stay, Grill:

Adding the handles was very simple, but as with all body drilling there was lots of checking and double checking before drilling the first hole. Here the bonnet off the car showing the handle:
 and the underside of the grill. I used a piece of rubber U-tube to hold the grill and then bonded it to the underside of the bonnet


Now the bonnet has handles and opens and closes its time to fit the stay. I looked into getting a couple of gas struts to support the bonnet, but since they aren't cheap and how often do you really need to open the bonnet... I have added it to my upgrade list. They do look good though - see a video of a cobra with bonnet struts:
https://www.youtube.com/watch?v=ma0FWMy6FXc

Once I figured out the measurements of where to place the bonnet stay it was a simple job to fit - I did have to make a small bracket to make fitting to the body stronger and slight lower:

Tuesday, 26 February 2013

The Bonnet fits

With the body sat in the garden I couldn't see how the bonnet was every going to fit. After trimming the edges following advice from the forums it still didn't sit right. So, contrary to the manual I did not fit the bonnet before putting the body on the chassis. I know I will probably have to remove it again, but having the body sitting straight (something that wasn't possible in the garden!) allows me to position the bonnet in the right place - just hope I can get an arm up to mark the position of the bolt holes... Apologies for the bad reflection from the carport roof:


Next is the seat belt mod as the way Pilgrim designed the top seat belt mount (embedded in the GRP body) isn't strong enough and can be an IVA failure.

Friday, 22 February 2013

The Body is on!

There are so many jobs that can't be completed properly without knowing how the body will fit. So with the help of a mate and 2 others we lifted the body and placed it on the chassis. It fits!
It only takes 2 to lift it, and 2 others to pull the sides out to stop them fouling the fuel line and loom on the sides


Saturday, 29 December 2012

Fitting the boot

The boot isn't a bad fit, but it isn't perfect. I had to remove the edge all the way around to make it fit. It won't be visible when the boot is shut, and since it is a dark colour I don't think it will be too bad when the boot is open. I have bought some gel coat from Pilgrim to touch up the edge if needed.

I bought the wrong boot seal. It is door seal, i.e. (Side Seal not Top Seal), and the same seal is used for boot and door. The lip around the boot aperture needs to also be trimmed - basically removing the return lip and cutting back so the boot trim sits close to the edge of the aperture. It must be fairly close so the seal doesn't prevent the boot from closing


Next is to fit the two hinges to the top. Very nervous about drilling holes in the body. "Measure twice - cut once"... more like read manual, watch video, think about it, measure, measure, measure again, think about it some more and put off until tomorrow.

Sunday, 16 December 2012

Body

The body is now sitting in the garden waiting to be dealt with:
 - Attach the boot lid
 - Attach the bonnet
 - Cut holes for lights
 - Start to work on those flash lines!